This is my third and final post about before & after pictures. This could be considered ‘during and after’ pictures as a fewof them are half way towards completion but… you get the idea. IFor what it’s worth, this isn’t a blog about photography. I’m simply trying to show how our woodwork can improve the places we live & work in. (It’s hard enough to find the time to go back a month later to photograph some work after it’s painted, much less be able to spend three hours lighting & dressing ‘the set’.) Hell, I’m even showing some that were shot & sent to us by the client.
Anyway…
These first two pics show a section of the front of my house before & after painting. The white on white had become grungy looking (not to mention boring) so we went with a beige and did all the trim in a dark green. An understanding of color and a ‘fresh coat’ can really renew a setting.

 Here we made a custom vanity for a very skinny bathroom. It needed to hold their sink, enclose a cast iron radiator & provided some open shelving. The way we had to make these cabinets in order to 1) be small enough to come up a very small, turn of the century stairwell 2) fit around all the existing plumbing and 3) leave access to all the valves… was somewhat disconcerting… but the interior decorator (Cottages to Castles, Inc.) & client were very pleased when all was finished.

 I really should go back & try for a better shot of this arbor. The final shot was taken at night with pool lights… hence the grainy look. I designed a rather different looking arbor here. Although difficult to explain, the placement off this arbor in the backyard’s corner required me to give up a basic rectangle with the opening on one of it’s sides (which would have made it’s construction simple). and create one that was open on one of it’s corners. The pair of rafters running up the center are fastened to a pair of rafters running parallel to the pool house’s face though attached from underneath. Not your typical arbor construction.We created the panels at the bottom of the posts to enrich what would have simply been posts otherwise. After the painting was accomplished, it all ‘came together’ nicely we thought.

 The next two are of my own foyer where I removed a cast iron railing and found a salvaged, old Victorian banister made from solid walnut (well over 100 years old) that I got at one of those huge flea markets / I had to do some retro fitting & make two additional newels for the upper landings. All those spindles were dovetailed into the tread’s ends. This has improved the look of our foyer ten fold.

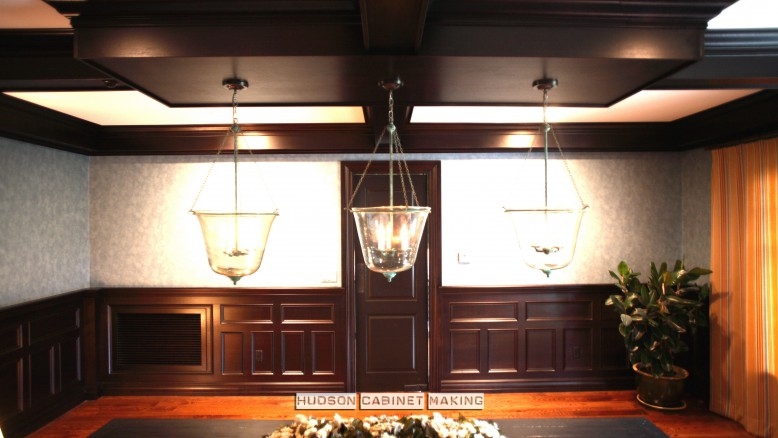
 Lastly is a wainscot and coffer-ed ceiling adornment we did for a client’s rather formal dining room. This required that we perform furniture quality work ‘on-site’. We created all the walnut panel, coffers, installed the trim and had our finisher come in and stain it all to this very dark value. A louvered vent was fabricated (of walnut) in one of the corners to handle the home’s central air.
A large dinner party was thrown two weeks thereafter and the owners expressed their pride to me… which in turn, of course, made me proud.

 My sons and I did fairly meticulous work in this good sized home (calling it a mansion wouldn’t be much of a stretch) and there isn’t a single seam to be seen where all these pieces of solid walnut join one another. We love being commissioned to do high-end work, … projects that allow us to show what we can do.
 And I’m glad we have the pictures to prove it.
Russell Hudson / Hudson Cabinetmaking, Inc. – 1/10/13
You must be logged in to post a comment.